SAFARI TO LEMOSHO ROUTE  FOR HIKING KILIMANJARO

The Lemosho Route is often considered the most beautiful of all the trekking trails despite the fact that it is one of the new routes introduced on the Mount Kilimanjaro. On top of all, the route shares a portion of the same path as Machame route although it holds a few advantages over that route that definitely makes worth considering particularly for tourists who have some extra time

Location

Starting the western flanks of Mount Kilimanjaro at the Londorossi Gate, the Lemosho Route traverses its way up one of the more remote sections of the mountain then it crosses the entire Shira Plateau from west to east in a pleasant flat hike. Crowds are low until the route joins the Machame route near Lava Tower.

Lemosho route merges with Machame route and the amount of traffic begins to increase. But if you are looking for a little peace and quiet moment in the early going of the climb, this is a great option

Attractions

The trail takes hikers through a beautiful rain forest where they might have the chance to spot wildlife along the way. Black and white colobus monkeys are always seen in the forest as are blue monkeys, small lizards and a wide assortment of birds. From there, the path wanders out onto the Shira Plateau crossing it from west to east on relatively flat and easy to walk terrain

However much it follows the Machame Route for a portion of the climb, much of the same scenery is found on Lemosho route as well including the Lava Tower and Barranco Wall. But in the first days the trail offers some unique views of the surrounding landscapes that are not visible from any other place on the mountain

Activities

They first days on the Lemosho Route provides plenty of solitude as this trail sees far less traffic than Machame Route and Marangu Route. This makes an already great trekking adventure even more spectacular as at times, the traveler will feel like you have the entire mountain to yourself.

There are certain sections of the trail that are both steep and more demanding. Trekkers spend an extra night or two sleeping in tents as well. The relevancy of this route truly makes it outstanding compared to the other routes hence making it an increasingly popular choice for adventurous tourists.

Travelers will get the chance to wander through fantastic rain forest and hike up to the Shira Plateau where once above, the tree line stunning visitor awaits. Due to this remote nature and lengthy route, Lemosho takes a few extra days of trekking. Most people spend seven to eight days on this trail which causes the success rate to increase fairly dramatically.

It should be noted that Lemosho route is a more strenuous hike than the “Whiskey” and “Coca-Cola”. If you are looking to maximize your chances of reaching the top of the mountain, this is certainly one of the best options to choose between Machame route and Marangu route.

This Route is both a 7 day and also a camping climb meaning that accommodation can be catered for with the availability of tents by Nature nest Safaris. For the first three days of this route are seldom visited and part of the mountain. It then joins the Machame Route and heads towards the summit
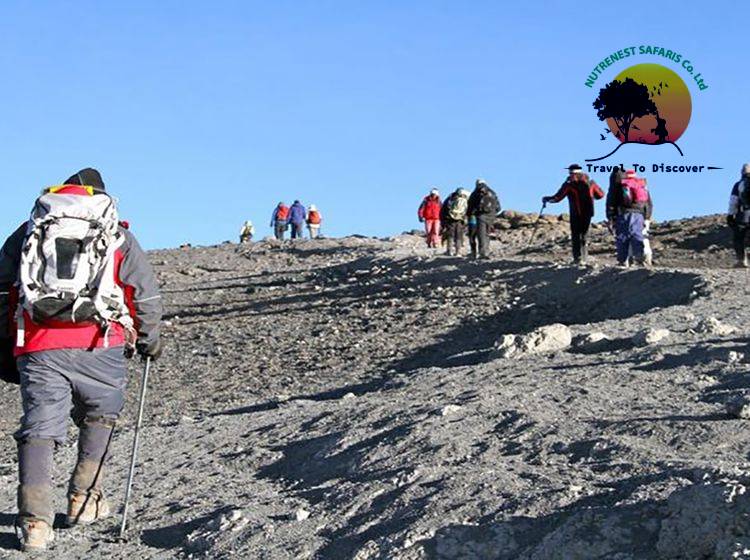
The detailed itinerary

Day 1: Lemosho Glades To Mti Mkubwa/Big Tree Camp

Following a fairly lengthy drive you will arrive at Lemosho Glades, where you will register, pay the park fees and where the porters have their luggage weighed to ensure that they are not carrying more than the specified maximum. The whole of the first day’s trek is spent in some of the most beautiful to be found anywhere else on the mountain. Given the fact that this trail sees relatively few tourists, encounters with wildlife are more likely to be found (the unsual flora and fauna), compared to the other routes.

Day one ends at Mti mkubwa, the Big Tree Camp (2785m). As with every night on the trek, you will arrive to find your tents already put in place and a snack waiting to welcome you. A full dinner follows before you settle down to sleep to the sounds of the forest, with vocals of monkeys and the noisy turaco bird in this most blissful of locations, underneath the spreading branches of a beautiful old podocarpus tree

Day 2: Mti Mkubwa/Big Tree Camp To Shira 1 Campsite

This second day starts off with a continuation of yesterday’s movements through the forest. Before long, however, you will leave the trees behind to enter the grasses and wild flowers of the Heath and moorland zone. Still climbing, you will eventually round the northern slopes of the Shira Ridge – Kilimanjaro’s little-known third summit and pause to view the magnificent snow-covered Kibo summit. Descending a short distance, you will arrive at you second campsite, the Shira One Campsite (3504m), on the western edge of the Shira Plateau, with views across the plateau to Kibo

Day 3: Shira 1 Campsite To Shira Huts Campsite

Here comes third day, you can just cut a straight path across the plateau towards Kibo, but if you have the energy, this wonderful morning can be spent exploring some of the features of the Shira Ridge. These include the Cathedral, from where you get great views across the plateau towards Kibo and along the southern slopes of Kilimanjaro. It is also extremely useful for acclimatizion as you climb steadily to 3720m before descending back to the plateau. A continuation to the east towards Kibo, eventually reaching the Shira Huts Campsite (3895m) at the heart of the plateau

Day 4: Shira Huts Campsite To Lava Tower And On To Barranco Campsite

The day starts with a slow movement directly towards Kibo. The flora increases its scarcity now as you climb higher, with only a few everlastings, like living potpouri, decorating the path. It’s a long walk but a very photogenic one with the snowy summit of Kilimanjaro a constant looming presence ahead. Continue with your trail while heading into some serious altitude, with Lava Tower, at the foot of Kibo, the next destination, standing at 4530m above sea level. It is here that the path splits.

If your safari plan is to continue onto Barranco on the ‘usual’ Lemosho Route, you will have lunch near the Lava Tower. But if you plan to climb via the Western Breach, you will camp at Lava Tower. It is very normal for people to have a slight headache at Lava Tower, or after descending to Barranco Camp (3985m), and only worrying if the symptoms persist. By way of compensation, Barranco is perhaps the prettiest campsite on the route, though it’s often overcrowded. Snacks and then dinner is served in the evening

Day 5: Barranco Camp To Barafu Camp/Huts Via Karanga Valley

This long day begins with the steepest section of the entire trek as you spend the first hour or so climbing the Breakfast Wall. From here the path meanders across scree slopes as you traverse the southern slopes of Kibo. A steep drop then brings you to the floor of the flora-rich Karanga Valley. This lies 4034m above sea level, and 5.1km from Barranco Campsite. Though your destination for lunch shares its name with this beautiful valley, it actually lies a stiff 20- minute climb up the opposite side of the valley.

Depending on which itinerary you are following, you may stop overnight at Karanga. Otherwise, you will have lunch while enjoying the views north towards the southern face of Kibo. This, hopefully, will distract you from any ill affects you may feel because of the altitude. A short afternoon follows (3.4km) as you traverse the southern side of Kibo, walking through a spectacular lunar landscape. It’s mostly straightforward, though the initial walk from the camp is almost entirely uphill and quite relentless.

Climbing onto a ridge, we reach chilly Barafu Camp (4662m) on the south-eastern shoulder of Kibo. Here you will rest, take both lunch and dinner, and try to get some sleep before the rigours of the night ahead

Day 6: Barafu Camp/Huts To Summit And Descent To Mweka Camp/Huts

Waking up at around midnight, begin your slow hiking up to Stella Point (5745m) on the edge of the Kibo crater. It’s a steep, slow, cold movement and a test of your endurance – this is where you are rewarded with your Kilimanjaro certificate.

Nevertheless, providing you have avoided altitude sickness, there is no reason why you shouldn’t make it up to Stella Point. From Stella Point it is a mere 45 minutes further on, past glaciers and snowfields and with views over the Kibo Crater, to Uhuru Peak – at 5895m the highest point in Africa. Here, if you are on time, you can watch the sun rise over the African continent, take photos – and take a breather too

Day 7: The descent on Mweka Trail.

After a rest at the top, you continue back down to Barafu Camp – a walk that is considerably quicker than it was on the way up. At Barafu, you have breakfast and relax for an hour, before continuing your movements down the mountain, this time on the Mweka Trail.

Today’s walk takes you back down through the alpine desert, heath and moorland zones until you once more enter the forest zone via Millennium Camp (3827m). There, amongst the trees, you find the Mweka Campsite (3106m), our final stop on the trek.